


Rezepte
BRAUEN EINES WEIHNACHTSBIERES
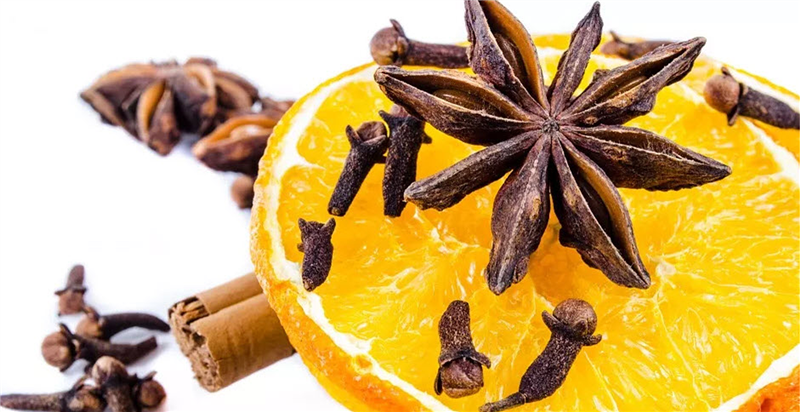
Christmas Ales (or ‘Winter Seasonal Beers’ as they are classified by the BJCP) are a great style to brew when the weather starts to turn cold and you need something strong, warming and full of complex flavours to get you in the holiday spirit. These beers are designed to be aged so they are deliberately created with higher ABV, fuller-bodied and complex taste profiles. This allows the brewer to make beer a few months before Christmas, safe in the knowledge that when they come to drink them, they will be well rounded, boozy winter warmers. Christmas ales can cover a variety of base styles. Many examples are spiced so the base beer should be able to carry the flavours well. A beer with a full body and a higher alcohol content is true to style so some Belgian styles can work well or else specialty dark beers. The joy of brewing a Christmas ale is that it gives the brewer a lot of creative freedom – there’s no ‘right’ way to brew a Christmas ale so it’s a style you can have some fun with. We find it easiest to start with a concept, something that reminds you of the holidays. This might be Christmas pudding, gingerbread, fruits, desserts or anything else that you decide. Once you have your base beer and your concept it’s time to decide what adjuncts you will need. Try and remember that if you decide to do a ‘Christmas pudding ale’ it doesn’t actually need to have Christmas pudding in it (although you could try adding this to the mash if you really wanted?) but instead you should be selecting flavours that are reminiscent of Christmas pudding so that when someone drinks your beer it is drinkable, enjoyable and they can pick out the flavours of Christmas pudding. A good rule of thumb for adding flavours to beer is to always remember it should be a beer first. So let’s take a look at putting a Christmas beer together. Firstly, our concept. We prefer the more traditional ‘winter warmer’ style so we wanted the base style to be something malty and full-bodied. A strong Scotch ale would work well. A well-brewed example of the style is malt forward and caramel flavoured with an aroma of breadiness and biscuit. A nice, fairly sweet finish combined with the malt character makes this a good beer choice for a dessert-inspired beer and won’t require too many additions. Cinnamon, nutmeg and cloves have that traditional Christmas dessert feel that we’re after. Cinnamon in particular has that lovely sweet and slightly woody flavour that will compliment the beer well. Clove and nutmeg should be used sparingly though. Cloves in particular contain an oil that numbs the tastebuds and nutmeg contains the same oil whilst being potent and sweet. Traditionally spices are added in the last few minutes (5-10) of the boil but you may also choose to add them during fermentation. Adding at fermentation may mean placing in a hop bag but this can be a bit of a nightmare, particularly with crushed spices and powders. An easier way is to put the spices in a glass jar with enough vodka to cover them. Leave the spices in the vodka for between 4 to 6 days, shaking daily, before adding to the fermenter through a sanitised strainer (ideally with some filter paper in the strainer). As the spices we’re using are quite potent, we’re using 1/4 teaspoon of Cinnamon, 1/8 teaspoon of nutmeg and 1/8 teaspoon of clove. With spices, start low as they can easily overpower your beer. There is a little bit of trial and error involved here but it’s usually easier to add more flavour than to take flavour away. If you are using fruits or parts of fruit such as bitter orange peel then again these can be added during the boil or to the fermenter. You can go a little bit higher on fruits to get the flavour profile you are after. Our preferred method for adding fresh fruit flavour is to freeze the fruit first (bursting the cell walls and allowing more flavour to be extracted) before heating the fruit to around 80°C (176°F) and holding it there to pasteurise the beer. Mash the fruit into a puree before allowing it to cool to the same temperature as your beer. Add the fruit to a sanitised fermenter before syphoning your beer directly on top. Any sugar additions, including things like honey or molasses, can be added in the last few minutes of the boil. Some brewers like to add this at packaging but be careful if doing it this way as adding extra fermentables at bottling can be a bit risky. So, a strong scotch ale with cinnamon, clove and nutmeg. Here is what our recipe looks like; OG: 1.091 FG: 1.023 ABV: 8.93% IBU: 25.34 SRM: 16.10 BU/GU: 0.28 Boil Time: 90 minutes Fermentables 7kg Maris Otter (87.3%) 0.45kg Crystal 40L (5.6%) 0.35kg Munich (4.4%) 0.18kg Crystal 120L (2.2%) 0.04kg Roasted Barley (0.5%) Total: 8.02kg Hops 40g East Kent Goldings 25g Fuggles Mashing in for 90 minutes at 68°C (154°F) will help to create a sweeter, more full-bodied ale. Combined with the increased melanoidins from an extended boil and the different specialty malts this should be a big, boozy, malt-forward ale. We will add the tincture to the fermenter once primary fermentation is done and allow it to sit in the fermenter for 3-4 days before bottling. Overall the finished beer should be warming, boozy, sweet and full of flavour but overall well balanced. A great Christmas ale!
Mehr erfahren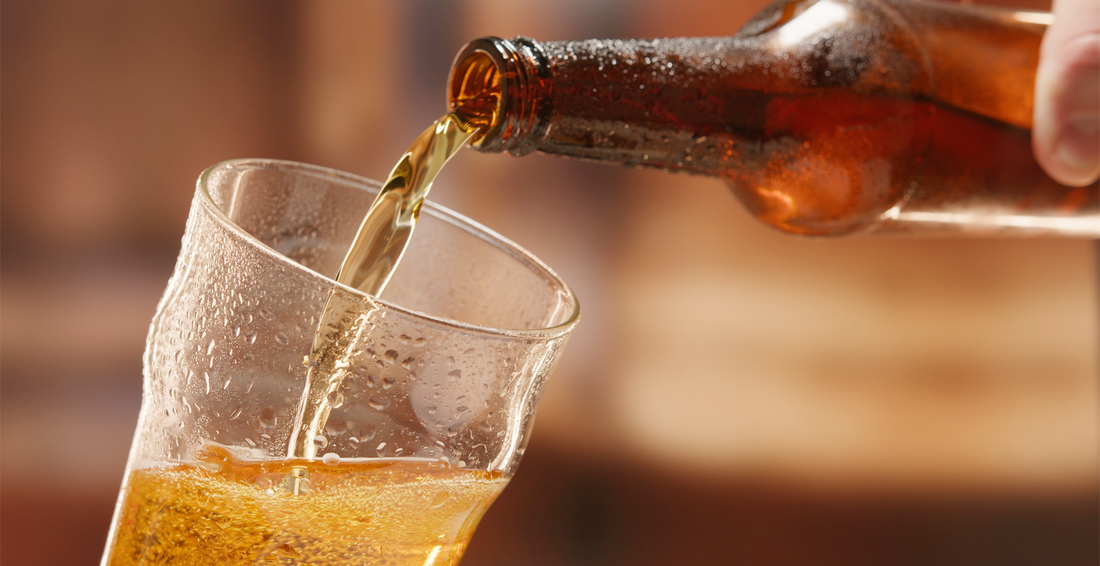
LAGERBIER BRAUEN
Brewing a Lager Style Beer Though lagers are how many of us got started with our love of good beers, the amount of homebrewers who actually brew lagers, compared to ales, is relatively small. Why is this? Lager brewing requires the ability to control your fermentation temperature, and the more accurately you can control fermentation temperatures the better your end results will be. For many brewers, this means building a dedicated fermentation chamber with temperature control which can be an off-putting project for some. Other techniques which are more widely available, such as ice baths, can yield good results but can make it difficult to maintain accuracy and repeatability going forward. Another issue with lager brewing is the patience required. Ales are ready relatively quickly in comparison to lagers which can undergo lagering periods of 12 weeks or more. This ties up a fermenter and your fermentation chamber for a significant period of time which can be off-putting. Lastly, lagers are a very technical style of beer to brew. Though many craft beer drinkers may prefer highly hopped, or sour, or smoked beers it actually takes a high level of proficiency to brew a lager well, right from recipe formulation and throughout fermentation and packaging there is a lot to consider to make the clean, crisp and well-balanced beer people expect when you serve them a lager. We spoke to Dave in our UK office who gave us his tips for brewing a lager at home. ‘Brewing a lager can be a huge accomplishment as a home brewer. It requires very precise control over several aspects of fermentation and unlike many ales where some dry hopping or fruit additions can cover a multitude of sins, lager brewing leaves the brewer very much exposed. The clean and balanced profile leaving very little margin for error. As homebrewers, we shouldn’t be put off, however. Yes, lager brewing requires some technical know-how and some precise process control but as long as you follow some simple steps, a great lager is by no means out of reach. Malt Bill For most styles of lager your malt bill is going to consist largely of good quality pilsner malt or possibly 2-row or lager malt. Depending on your water chemistry you may need to make adjustments to your pH and acidulated malt is a good option for this (especially if making authentic German lagers). If this is required, 1% of acidulated malt will reduce mash pH by 0.1. Depending on style you may wish to add some specialty malts for bread crust/malt flavours such as Melanoidin, Munich or Vienna. Some brewers will also choose to add light caramel malts to their grain bill which can work well but should be avoided if making a Pilsner. Carapils can also be an excellent addition to lager styles to help with head retention and body – less than 10% of the grain bill should be sufficient. In a lot of American style lagers, adjuncts such as corn and rice are used. They provide starch in the mash which is broken down into sugars but does not affect the end flavour of the beer (or their contribution is minimal). Water In many instances, a low sulfate level is desirable for making good lagers. Many homebrewers who brew lagers will start with distilled or reverse osmosis water and then make salt additions, in particular calcium carbonate, sodium chloride or calcium chloride. Gypsum (calcium sulfate) additions are usually wrong for the style. With sulfates, levels of below 150ppm are desirable. The water profile for a light lager may look like this; Ca 35 – 55 Mg 0 Na 20 – 35 CO3 0 SO4 85-135 Cl 35-55 And for a Pilsner; Ca 7 Mg 2 – 8 Na 2 CO3 15 SO4 5 – 6 Cl 5 And a bock; Ca 55 – 65 Mg 0 Na 40 – 60 CO3 60 SO4 35 – 55 Cl 60 – 110 Hops There are many hop varieties that are traditionally associated with lagers. Saaz is typical for Czech pilsners and in classic examples will be the only variety used. In German-style lagers, hops such as Hallertauer or Tettnang are common and in American style lagers, Mt. Hood and Liberty are good choices. As always you should feel free to play around with hop varieties and additions and are in no way constrained to strictly following style guidelines but if you are aiming to stay true to style then typically lagers are lightly hopped, malt-forward styles (other than Pilsners which typically have a much larger bittering addition and a BU:GU ratio of around 0.80). Of course, there are variations on style and many breweries now produce hop-forward craft lagers or India Pale Lagers which can be an interesting take on the beer. Yeast As a standard rule of thumb, lagers need around twice the amount of yeast that an ale of a similar gravity would need, or to be more specific, around 1.5 million cells per millilitre of wort per degree plato. If you are pitching dry yeast this simply means pitching twice as much yeast as you would normally. If you are using liquid yeast you will need to grow up a large starter of around 3-4 litres and as you grow the starter, slowly reduce the temperature until it is close to your pitching temperature, so you might start your yeast starter at 18C/64F but by the time you ramp it up to 4 litres it should be between 7-9C (45F-48F). Many homebrewers choose to pitch warm because it can result in a shorter lag phase and means less yeast is required however, a warmer pitching rate will lead to greater production of esters, fusel alcohols and diacetyl which are undesirable in most lager styles to any great degree. With most lager styles, the fermentation profile is very clean although some diacetyl or light yeast esters can be acceptable. The production of these flavours is largely controlled through the brewing process. The Fermentation There are many different approaches to fermenting lagers, all of which can produce good results so if you have a process that works well for you it is fine to stick with it. This is just a simple step by step process for a typical lager fermentation; Once you have completed your brew, chill the wort down to around 8 or 9C (46.4F -48.2F). If you are using a yeast starter you should have grown this to a sufficient level prior to pitching. Pitching cold can increase lag time. The colder temperature enables the beer to absorb more CO2 before it is pushed out of suspension, creating the krausen so if you do not see signs of fermentation as soon as you would expect based on your ale brews, don’t panic. Allow primary fermentation to take place. As best as possible keep the temperature between 9-11C (48-52F) or within the range recommended for your chosen yeast strain. At these temperatures primary fermentation is likely to take longer than usual so expect this to last between 3 and 4 weeks. After primary fermentation, transfer your lager to a secondary fermenter being careful to minimise oxygen pick up. This begins the lagering phase which refers to an extended period of cold storing. This phase can last from two right up to twelve weeks. This clears up the beer, both in terms of appearance and flavour. Solids will drop out of suspension leading to a brighter looking lager and diacetyl produced during fermentation should be cleaned up by the yeast. As lagers undergo extended periods of time in fermenting vessels when it comes to bottling your lager you may wish to pitch a small amount of extra yeast to ensure the beer carbonates properly. Other Considerations for Brewing Lagers In a lot of instances when brewing a lager you are aiming for a light and crisp beer. To achieve this, either mash at the lower temperature end (65c/148F) or mash very low (62C/144F) and then ramp up the temperature to 69C (156F). This two-step mash ensures you target both alpha and beta amylase, resulting in a more fermentable wort and a lighter bodied beer. DMS (dimethyl sulfide) can be present in a lot of lager styles to some extent but in any great quantity it is considered an off flavour. Unfortunately, pilsner malt and other very pale malts contain high levels of the pre-cursor to DMS which can impart a creamed corn type flavour into your lagers. To avoid this you should boil your lagers vigorously and uncovered for 90 minutes. Diacetyl is another off flavour that is naturally produced by yeast as part of the brewing process. Yeast will naturally reabsorb diacetyl towards the end of fermentation but this can be a slow process when you are fermenting cold. To help with this, many brewers will raise the temperature of their beer to between 18-20C (50-55F) for the last two days of fermentation to help clean up diacetyl before lowering the temperature again for the lagering phase.’ So there you have it, some tips for creating a recipe for a lager and how to brew one successfully.
Mehr erfahren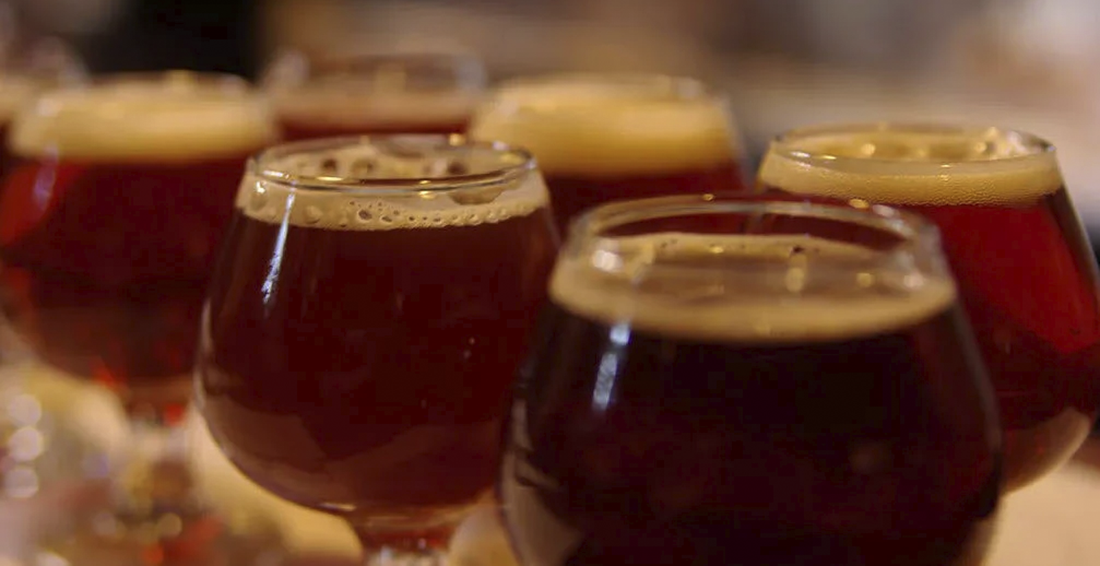
BRAUEN EINES BARLEYWINE
Obwohl sie in letzter Zeit an Popularität verloren zu haben scheinen (mit dem Aufkommen von Handwerksbrauereien, die jetzt "Imperial"- oder "Double"-Versionen von fast jedem Stil herstellen), sind Barleywines für uns immer noch die Könige der Biere. Sie sind in der Bierwelt das Äquivalent zum Single Malt Whisky oder zum Wein. Sie sind ein größeres, stärkeres, malziges Kraftpaket von einem Bier, sie waren der ursprüngliche "Turn it to eleven"-Stil und verdienen definitiv immer noch eine Menge Liebe. Der Begriff "Barleywine" als Stil bleibt jedoch etwas undefiniert. Die Wurzeln des Stils scheinen aus einer Zeit zu stammen, in der das Brauen von Teilbieren die Norm war, d. h. die Herstellung einer Charge Bier und die Verwendung des Erstlaufs, um ein starkes Bier mit hohem Alkoholgehalt zu erzeugen, und dann das erneute Aufgießen, um ein zweites und sogar ein drittes, kleineres "Tischbier" herzustellen. Mit dem Aufkommen des Hydrometers konnten die Brauer den Alkoholgehalt ihrer Biere berechnen, was wiederum dazu führte, dass sie auf der Grundlage der Stärke des von ihnen hergestellten Bieres besteuert wurden. Dies führte zu einem Rückgang der Beliebtheit dieser starken Biere und zu einer Hinwendung zu "süffigeren" Biersorten. Da sich die Stildefinitionen immer mehr durchsetzten, war es für Barleywine nicht gerade förderlich, dass es viele Ähnlichkeiten mit Old Ales und Imperial IPAs aufweist und zudem in amerikanische und britische Varianten aufgeteilt ist. Obwohl das BJCP eine klare ABV-Skala definiert hat, gibt es auch kommerzielle Biere, die als Barleywines bezeichnet werden und die auf beiden Seiten außerhalb dieser Skala liegen. Barleywine ist zum Synonym für "Starkbier" geworden und wurde dann von Imperial IPAs verdrängt, die die Vorliebe der Menschen für alles IPA ausnutzen. Als Brauer stellt ein wirklich guter Barleywine jedoch viele Elemente des Brauprozesses auf die Probe. Es kann schwierig sein, einen angemessenen Wirkungsgrad für ein Bier zu erzielen, das so viel Malz benötigt, und bei der Herstellung eines Bieres, bei dem der Malzcharakter eine Schlüsselkomponente ist, kann es verlockend sein, alle möglichen seltsamen und wunderbaren Spezialmalze zu verwenden. Wahrhaft großartige Barleywines können jedoch mit nichts anderem als hellem Malz hergestellt werden. Die Sauerstoffanreicherung der Würze ist von entscheidender Bedeutung, ebenso wie die richtige Anstellgeschwindigkeit und die Herstellung eines gesunden Hefestarters. Die Gärung bringt dann eine Reihe von Problemen mit sich. Es kann schwierig sein, bei einem Bier dieser Stärke eine anständige Gärung zu erreichen und eine Hefe zu finden, die mit einer Würze mit so hohem Stammwürzegehalt zurechtkommt. Die Auswahl der Hefe ist äußerst wichtig, da die Esterbildung in der amerikanischen Version kein wesentlicher Bestandteil des Stils ist, so dass Sie eine Hefe benötigen, die eine hohe Stammwürze vergären kann, ohne gestresst zu werden und große Mengen an Geschmacksstoffen zu produzieren. Bei britischen Barley Wines sind einige Fruchtester akzeptabel. Wenn Sie einen dunkleren Barleywine herstellen, sollten diese am Ende des Spektrums in Richtung dunkle Früchte gehen, während helle Barleywines, wenn vorhanden, leichtere Ester aufweisen sollten. Barleywines erfordern viel Malz, das in jedem System viel Platz einnimmt. Die meisten Leute werden es wahrscheinlich einfacher finden, eine kleinere Menge zu brauen, wenn Sie diesen Stil nur aus Getreide herstellen wollen. Sie können auch eine partielle oder wiederholte Maischung durchführen, Malzextrakt verwenden, um Ihre Stammwürze zu erreichen, oder die Würze länger kochen, um eine konzentriertere Würze zu erhalten (oder eine Kombination dieser Techniken). Wie bereits erwähnt, kann ein großartiger Barleywine mit einem geschmacksintensiven Grundmalz wie Maris Otter hergestellt werden, aber Sie können auch Wiener, Münchner oder eine kleine Menge Cara-/Kristallmalz hinzufügen, um die Komplexität des Malzes zu erhöhen. Es ist jedoch nicht nötig, das Rezept zu kompliziert zu gestalten, denn Sie sollten einen so hohen Malzanteil verwenden, dass Sie nicht riskieren, dass der Malzcharakter verloren geht. Was die Hopfengaben betrifft, so ist dies in erster Linie das, was eine britische oder amerikanische Version des Stils ausmacht (es gibt noch einige andere Unterschiede, aber die Wahl des Hopfens ist der wichtigste!) Wenn Sie einen britischen Barley Wine brauen, sollten Sie traditionellen britischen Hopfen verwenden - zum Beispiel Fuggles oder East Kent Goldings. Der IBU-Wert liegt zwischen 35 und 70, abhängig von der Stammwürze Ihrer Würze. Achten Sie aber auf die Ausgewogenheit - Ihr BU:GU sollte bei diesem Stil etwa 0,52 betragen. Für einen American Barleywine ist ein Wert zwischen 50 und 100 IBU akzeptabel, und die BU:GU-Balance sollte eher bei 0,8-0,9 liegen. Was die Wahl des Hopfens für die amerikanische Sorte angeht, so akzeptieren die Richtlinien alles, was zitrusartig, fruchtig oder aus der Neuen Welt ist, also fühlen Sie sich in Ihrer Wahl nicht eingeschränkt, aber klassische amerikanische Hopfen (die drei C's und Amarillo zum Beispiel) funktionieren gut. Auch wenn der Hopfencharakter bei den amerikanischen Sorten durchsetzungsfähiger ist, sollte dennoch ein reichhaltiger Malzcharakter vorhanden sein. Hier ist unser Rezept für einen klassischen American Style Barleywine mit einigen Tipps, wie man für ein Bier dieser Größe effektiv einmaischt; Großmaul schlägt wieder zu (https://community.grainfather.com/recipes/16379) Das sind also unsere Tipps für das Brauen eines Barleywine. Es sind große Biere und wie alle großen Biere haben sie ihre eigenen Herausforderungen, aber es lohnt sich immer, diesen Stil gut zu brauen.
Mehr erfahren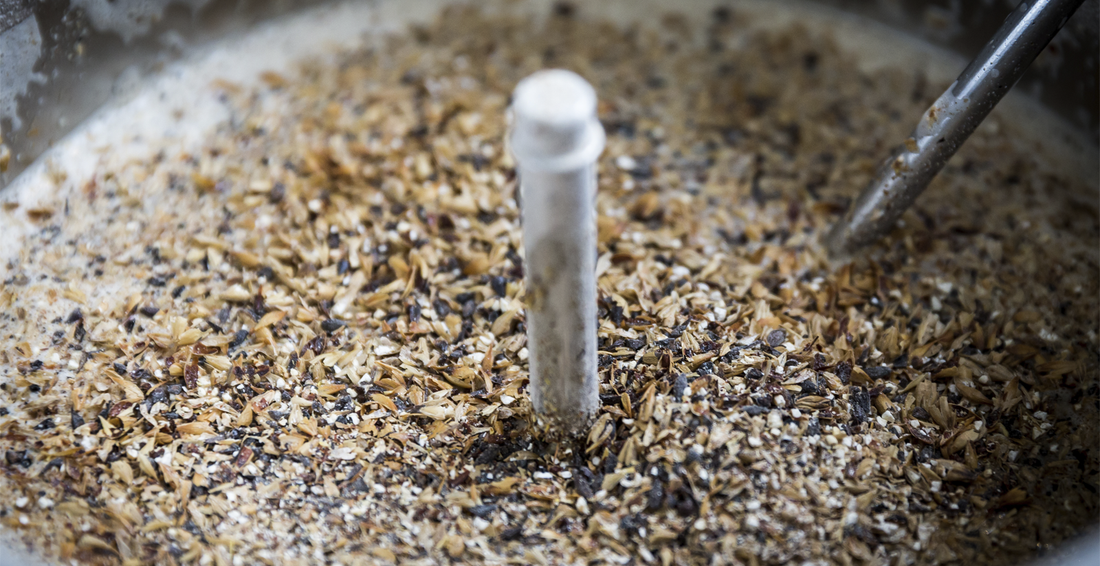
BRAUEN EINER GRUIT
ave von unserem britischen Standort hat beschlossen, dass es eine gute Idee wäre, ein Bier ohne Hopfen zu brauen... Ich wiederhole, OHNE HOPFEN! "Eine lächerliche Idee", höre ich Sie sagen. Wahrscheinlich, aber vielleicht auch nicht. Lesen Sie unten, was er beim Brauen eines "Gruit" gelernt hat. Für viele ist Hopfen eine der vier grundlegenden Zutaten für die Herstellung eines Bieres. Das war jedoch nicht immer so. Bis zum 16. Jahrhundert wurden beliebte Biersorten ohne Hopfen gebraut und stattdessen eine Mischung aus Kräutern und Gewürzen verwendet, um die Aromen und die Bitterkeit zu erzeugen, die der Hopfen in den meisten modernen Bieren liefert. Diese Biere ohne Hopfen sind als Gruit Ales bekannt. Ich wollte versuchen, meine eigene Version eines Bieres zu kreieren, das ohne Hopfen gebraut wurde, da ich neugierig war, ob es möglich war, mit Kräutern und Gewürzen eine ausgewogene Bitterkeit und ein tolles Aroma zu erzielen. Ich entschied mich für ein einfaches, dunkles Bier, bei dem ich das Gefühl hatte, dass die Kräuter und Gewürze gut zur Geltung kommen würden. Es ist ein Mischmasch aus verschiedenen Getreidesorten, da ich eigentlich keinen bestimmten Stil anstrebte, aber ich habe gelesen, dass ein hoher Anteil an dunklen Malzsorten dazu beiträgt, dem Bier die Bitterkeit zu verleihen, die normalerweise von der Hopfengabe herrührt; 4,9 kg Münchner Malz0,70 kg Carafa III0,42 kg Dark Crystal0,31 kg Carawheat Für meine Gewürzmischung entschied ich mich für die Zugabe von; 28 g Wacholderbeeren zur Bitterung bei 60 Minuten5 g Estragon, 13 g Minze und 27 g Rosmarin für Geschmack und Aroma bei 0 Minuten Nach der Zugabe der Kräuter und Gewürze verströmte der Grainfather ein starkes Aroma, das an einen Lammbraten erinnerte, und ich war ziemlich besorgt, wie das fertige Bier wohl schmecken würde. Unten sind einige Bilder vom Brautag zu sehen; Die Gärung war extrem stark und fiel innerhalb von 2 Tagen von 1,060 auf 1,026 und blies durch die Luftschleuse; VERKOSTUNGSANMERKUNGEN; Die Verkostung des Bieres war interessant. Der Geruch war nicht schlecht, ziemlich kräuterig, aber mit einem leichten Kaffeearoma, das durchkam, und die Farbe war großartig; tiefschwarz mit einer hellbraunen Schaumkrone, die sich schnell auflöste. Leider war der Geschmack unausgewogen und verworren. Die Minze war massiv übermächtig und die Kombination von Kräutern ließ es fast wie ein saures Bier schmecken. Die Aromen passten einfach nicht gut zusammen. Abgesehen von der übermäßigen Kräuternote hatte das Bier jedoch keine Mängel, und es war eine Bitterkeit vorhanden, die ich ohne Hopfen nicht erwartet hätte. Ich denke, das Hauptproblem war, dass ich mit meinen Aromazusätzen etwas zu aggressiv vorgegangen bin und nicht wirklich darüber nachgedacht habe, wie sie in einem Bier wirken würden, aber ich gehe bei meinen Experimenten gerne ins Extreme, um zu sehen, was möglich ist. Die Schlussfolgerung ist also, dass es möglich ist, ein Bier ohne Hopfen zu brauen, aber der Schlüssel zum Erfolg liegt in der Subtilität und einer guten Kenntnis der Geschmackskombinationen. Wenn Sie wirklich versuchen wollen, ein authentisches 'Gruit' zu brauen, finden Sie großartige Ressourcen unter: http://www.gruitale.com/intro_en.htm" - David
Mehr erfahren
MELDEN SIE SICH BEI UNSERER BRAU-APP AN, UM MILLIARDEN VON REZEPTEN ZU ENTDECKEN ODER IHRE EIGENEN ZU KREIEREN
Mit so vielen Rezepten zum Selberbrauen, die Sie in der App entdecken können, werden Sie in Versuchung kommen, etwas Neues auszuprobieren. Und mit unserem einzigartigen Rezeptersteller können Sie das Kommando übernehmen, mit Zutaten experimentieren und sich selbst herausfordern, Ihre eigenen Kreationen zu meistern.